Acrylic – also known as Plexiglass, Perspex, and Lucite – is a popular type of plastic to use due to its many advantages. For example, clear acrylic sheets have exceptional optical clarity, while colored acrylic sheets are available in a spectrum of colors. Unfortunately, when compared to stronger plastics like polycarbonate, plexiglass scratches more easily. This creates not only a visually unappealing appearance but also damages the acrylic’s durability. Thankfully, it’s often much easier to repair acrylic than it is to create scratches in the first place.
Key Takeaways
- Acrylic scratches can often be repaired, unlike cracks or crazing, which typically require replacement.
- Light scratches are best removed using a polish like Novus No. 2, combined with gentle circular buffing using a soft cloth.
- Moderate scratches require wet and dry sanding with 600–1200 grit sandpaper, followed by polishing with Novus products.
- Deep scratches (over 5 mm) are usually irreversible, and it’s often best to replace the sheet or upgrade to polycarbonate.
- Proper prep and clean tools are essential. Always clean acrylic with mild soap and use lint-free cloths to prevent new scratches during repair.
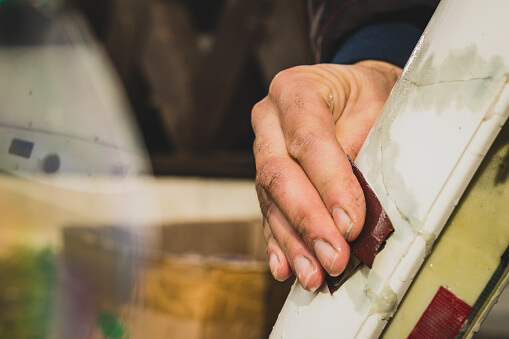
Removing surface scratches from acrylic only requires a few simple tools and a bit of determination. In this how-to guide, we will walk through how to evaluate scratches and provide instructions for repairing light and moderate scratches in acrylic.
Begin by Evaluating the Scratched Acrylic
Before you begin repairing scratches in acrylic, it’s important to make sure the acrylic is actually scratched. Make sure you’re not just looking at “crazing.” Did these scratches mysteriously appear shortly after cleaning the acrylic with chemical-based cleaners? If so, this is likely an unfortunate consequence of chemical damage – not scratching. Crazing requires a lot of aggressive sanding and polishing to fix, and often never looks good as new. It’s generally advised that you purchase a new sheet if the crazing is significant.
Once you have determined your plexiglass is scratched, you then need to determine the depth of the scratch – this will help you identify the best removal technique.
[wbcr_snippet id=”729″]
To evaluate the depth of scratches, lightly run your fingernail over the scratched portion of acrylic. If the scratch caught your fingernail, then it’s a deep scratch. If the scratch is deep, try to estimate how deep it is. Any scratches deeper than 5 mm are exceptionally heavy scratches – these are generally regarded as irreparable, and can only occasionally be repaired by specialty buffing tools.
Deep cracks cannot easily be fixed. If cracked acrylic must be fixed, there are a few ways to glue acrylic together. However, this won’t necessarily join the acrylic cleanly, and some glue residue may be visible. If this isn’t suitable for your acrylic’s use case, there’s not very much to be done – we would recommend purchasing a new acrylic sheet, or purchasing a stronger plastic like polycarbonate.
Removing Light Plexiglass Scratches
It’s easy to repair acrylic that has light surface scratches, which generally result from regular wear-and-tear. To begin, get a few basic items ready:
- Acrylic cleaner (we recommend Novus No. 1)
- Acrylic polish (we recommend Novus No. 2)
- Sandpaper (800 and 1200 grit)
- Water for the sandpaper
- Clean soft cotton or microfiber cloth
First, we will clean the acrylic. If there are small amounts of dirt on the acrylic, the acrylic will likely become more scratched during the repair process. For best results, we recommend spraying a special acrylic cleaner like Novus No. 1 on the acrylic. However, warm water and mild dish detergent will also do an adequate job. Then, use the cotton or microfiber cloth to gently clean the area. Rinse the acrylic with warm water and use a dry microfiber or cotton cloth to remove excess water.
Take a good look at these mild scratches. If the scratches are only visible upon close inspection, sandpaper may not be necessary. Instead, use an abrasive acrylic polish (we recommend Novus No. 2) directly on the scratched area and apply consistent, moderate pressure to a clean, soft rag. Move it in a circular motion until you can’t see the scratches. This could take a few minutes, so don’t panic if the scratches don’t disappear immediately. When you believe the acrylic is smooth, gently wipe off the compound with a clean cotton or microfiber towel.
If some scratches are still visible, get the sandpaper, water, acrylic polish, and a fresh, clean cotton or microfiber cloth. Then, follow these steps:
- Wet a piece of 800 grit sandpaper, and rub it onto the scratched portion in a circular motion.
- Use a piece of dry 800 grit sandpaper, and rub it onto the same portion in a circular motion.
- Alternate between the above two steps for about three minutes. Your acrylic may still look scratched – but we’re not done yet!
- Wet a piece of 1200 grit sandpaper, and lightly rub it into the scratched portion.
- Use a piece of dry 1200 grit sandpaper, and go over the above potion again.
- Alternate between the above two steps until you believe there are no more scratches.
- Take a dry, clean cotton or microfiber cloth. Wipe away any fragments. Warning: A dirty cloth could scratch the acrylic again!
- Now, apply Novus No. 2 to the sanded area. Gently use a clean cloth to rub it in.
- Gently wipe off the remaining Novus No. 2 with a clean, damp towel.
At this point, your acrylic should look shiny and as good as new. If you can still see a crack – the scratch was likely deeper than a light scratch.
Removing Moderate & Deep Plexiglass Scratches
The procedure to repair deeper scratches is similar to the process to repair light scratches, except we’re adding two more items – 600 grit sandpaper and Novus No. 3. Collect the following items:
- Acrylic Polish (we recommend all three Novus products)
- Clean, soft cotton or microfiber cloth
- Sandpaper (600, 800 and 1200 grit)
- Water for the sandpaper
Make sure that the acrylic sheet is cleaned either with dish soap or Novus No. 1. Then, follow this procedure to remove moderately deep (under 5 mm) scratches from acrylic:
- Wet a piece of 600 grit sandpaper, and rub it onto the scratched portion in a circular motion.
- Use a piece of dry 600 grit sandpaper, and rub it onto the same portion in a circular motion
- Alternate between the above two steps for about four minutes. Your acrylic will look rough – this is fine.
- Wet a piece of 800 grit sandpaper, and rub it onto the scratched portion in a circular motion.
- Use a piece of dry 800 grit sandpaper, and rub it onto the same portion in a circular motion
- Alternate between the above two steps for about three minutes.
- Wet a piece of 1200 grit sandpaper, and lightly rub it into the scratched portion in a circular motion.
- Use a piece of dry 1200 grit sandpaper, and go over the above potion again in a circular motion.
- Alternate between the above two steps until you believe there are no more scratches.
- Take a dry, clean cotton or microfiber cloth. Wipe away any fragments Warning: A dirty cloth could scratch the acrylic all over again!
- Spray Novus No. 3 to the sanded area. Gently use a clean cloth to polish with a firm, back and forth motion.
- Remove all remaining Novus No. 3 with a clean cloth.
- Apply Novus No. 2 to the area. Gently use a clean cloth in a firm, back and forth motion.
- Use a cloth to wipe away any remaining cleaner.
- After following this procedure, your acrylic should appear scratch-free. Polish the plastic using Novus No. 1 for best results.
Remember, extremely deep cracks cannot easily be fixed. If cracked acrylic must be fixed, there are a few ways to glue acrylic together. However, this won’t necessarily join the acrylic cleanly, and some glue residue may be visible. If this isn’t suitable for your acrylic’s use case, there’s not very much to be done. We – we would recommend purchasing a new acrylic sheet, or purchasing a stronger plastic like polycarbonate.
[wbcr_snippet id=”729″]
Final Thoughts
Whether acrylic plastic is being used for home use or commercial use, it’s an unfortunate reality that it may accidentally become scratched. Fortunately acrylic’s physical properties allow it to easily be buffed with special, slightly abrasive solutions. If a scratch is less than 5 mm deep, it’s a simple procedure to fix acrylic.
If your acrylic has sustained an exceptionally deep scratch, has been cracked, or undergone intense crazing, it may be time for a new piece of acrylic. To find the best possible replacement piece, visit our acrylic plastic page, or view our selection of cut-to-size acrylic. If you have any further questions about acrylic, contact us today.
