When it’s time to replace wood, plastic, or laminate items, many boaters and boat builders are turning to Marine Board, most known as Starboard. This polyethylene polymer sheet product won’t rot, splinter, swell or delaminate. And if that wasn’t enough, Starboard doesn’t require any painting, finishing, or maintenance. It can also be bent or thermoformed into different shapes and various effects, and while it can withstand most blunt impacts, it is easy to work on with woodworking tools including jigsaws, circular saws, drills, sanders, and routers.
But before you start planning your next project, check out these tips for working with Starboard.
Understanding Starboard
 Although there are plenty of Starboard projects you can plan, it’s important to remember that the material should not be used for structural purposes, such as planking your wood boat, replacing your plywood deck, or installing engine stringers. Why? Starboard’s flexural and tensile strength-to-weight ratio is much lower than wood, so it needs to be supported every 15″ to 18″ in every direction. And another working with Starboard tip: It needs to be mechanically fastened or welded to an area—it is virtually impossible to glue.
Some Starboard projects you can carry out include building cup holders, shelves, chart holders, table tops, bait boards, ladder treads, sink covers, trim, armrests, sliding doors, consoles, instrument panels, hatches, shower floors, and more.
Getting Started with Starboard Projects
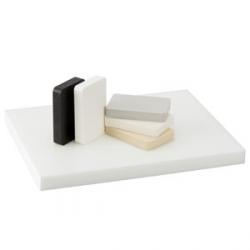
Starboard is available in thicknesses of 1/4″, 1/2″, and 3/4″. The thickness you choose will depend on your Starboard project needs. For example, 1/2” flexes easily so it won’t work for shelves where heavy objects will be placed. Instead, opt for 3/4” material, which is much stiffer.
It is also crucial that you select a Starboard that is a marine-grade polymer material, to get the full benefits of the material. With that in mind, make sure that you purchase Starboard from a reliable supplier, like Acme.
Cutting Starboard
Starboard is easy to cut with a jigsaw—just make sure the blades have a minimum of 10 teeth per inch. You can also use an 8-inch circular saw with blades with 70 to 80 carbide-tipped teeth.
Sanding and Edge Finishing for Starboard
Of course, you want to get rid of any rough edges on your Starboard. This can be done with a router outfitted with a flush trimming bit. A hand sanding or an orbital sander with 120-200 grit sandpaper can also be used.
Assembling Starboard
An important working with Starboard tip is that it needs to be either mechanically fastening it with stainless steel fasteners or welding the material to itself or other surfaces. Standard adhesives will not work with Starboard.
Tools and Supplies Needed
Be sure to take all safety precautions when cutting Starboard. Some of the tools to keep on hand when working on a Starboard project include:
- Table saw (50 to 75 carbide teeth)
- Table Router
- Saber saw
- Drill
- Carbide-toothed tools (for finer finishes)
Starboard Maintenance
One of the biggest perks of working with Starboard is that it’s so easy to maintain. Simply clean it with a solution of liquid soap and water and use a synthetic/nylon brush to scrub if needed. Stains can be removed with citrus cleaner, mineral spirits, or alcohol. Do not use Teak Oil as it can permanently stain the material. Lead pencil, ink pen, and permanent markers will also stain it.
Ready to start shopping for your next Starboard project? Click here to see Acme’s selection and don’t hesitate to reach out to our customer service team with any questions.
